My son's 3rd birthday is just a week away and I was looking for foods that would be kid-friendly and filling at the same time. I will have over some friends and their kids in celebration of Ryan's birthday. So I have started making some test dishes to see if they will be agreeable with my taste-testers (both my sons). Whatever gets a thumbs up, will make it on Ryan's party table. Well, this snack and drink got a two thumbs up from each of the boys.


INGREDIENTS FOR THE "ZOBO" (HIBISCUS JUICE):
-2 cups hibiscus, rinsed and drained. (I bought mine at a Hispanic grocery store . It goes by "Jamaica" or "Flor de Jamaica" there. You can also find it at Caribbean stores, where it goes by "Roselle". You can also find it in the US at Trader Joe's or Whole foods).
-10 cups of water.
-1/4 teaspoon baking soda, NOT baking powder (to help reduce some of the tartness).
-1/2 teaspoon pure vanilla extract.
-1/2 teaspoon orange blossom water (can be found on Amazon.com or at any Indian grocery store).
-1/2 teaspoon ginger paste (can be found in the produce section of the grocery store, by where they have the fresh herbs).
-1 cup of granulated sugar.
-1 cup of 100% pineapple juice (the kind you find in the frozen juice section of the grocery store).


INSTRUCTIONS FOR BREWING THE ZOBO:
-In a large pot on medium heat, bring the water to a boil.
-Add in the rinsed and drained hibiscus, the ginger paste, the baking soda, vanilla extract and orange-blossom water.
-Turn off the heat and cover the pot and let the hibiscus steep in the pot for 1-2 hrs.

-Using a large, fine mesh sifter over a large bowl or pitcher, strain the zobo into the pitcher or large bowl. If any sediments go through the sifter, repeat the process until there are no sediments in the concentrate.

-Add the pineapple juice into the sifted zobo concentrate, stir and refrigerate for at least an hour.

-To serve, add a little bit of water to a glass, and ice cubes if desired, and top the glass off with the zobo concentrate.

**If stored in a covered carafe or gallon, the zobo can keep refrigerated for up to a week.***
SERVING SIZE FOR THE MEAT PIES: Makes 11 medium meat pies.
SPECIAL EQUIPMENT FOR THE MEAT PIES:
-Measuring spoons.
-1 large mixing bowl with lid.
-Cling foil (for wrapping the kneaded dough).
-Large saute pan.
-Medium pan.
-Rolling pin.
-Pastry brush.
-Fork.
-5 inch round dough/cookie cutter (I couldn't find one, so I used the lid of a small pan whose edge was sharp enough to cut through dough.See pic).
-2 baking sheets lined with parchment paper or Silpat (oven and food-safe silicon mat).
-Clean kitchen cloth.
-Pastry blender (for mixing the butter into the flour).
-Shallow rectangular container (to spread your cooked filling and let it cool)
-cling/plastic foil.


INGREDIENTS FOR THE PASTRY/CRUST:
-3 cups flour
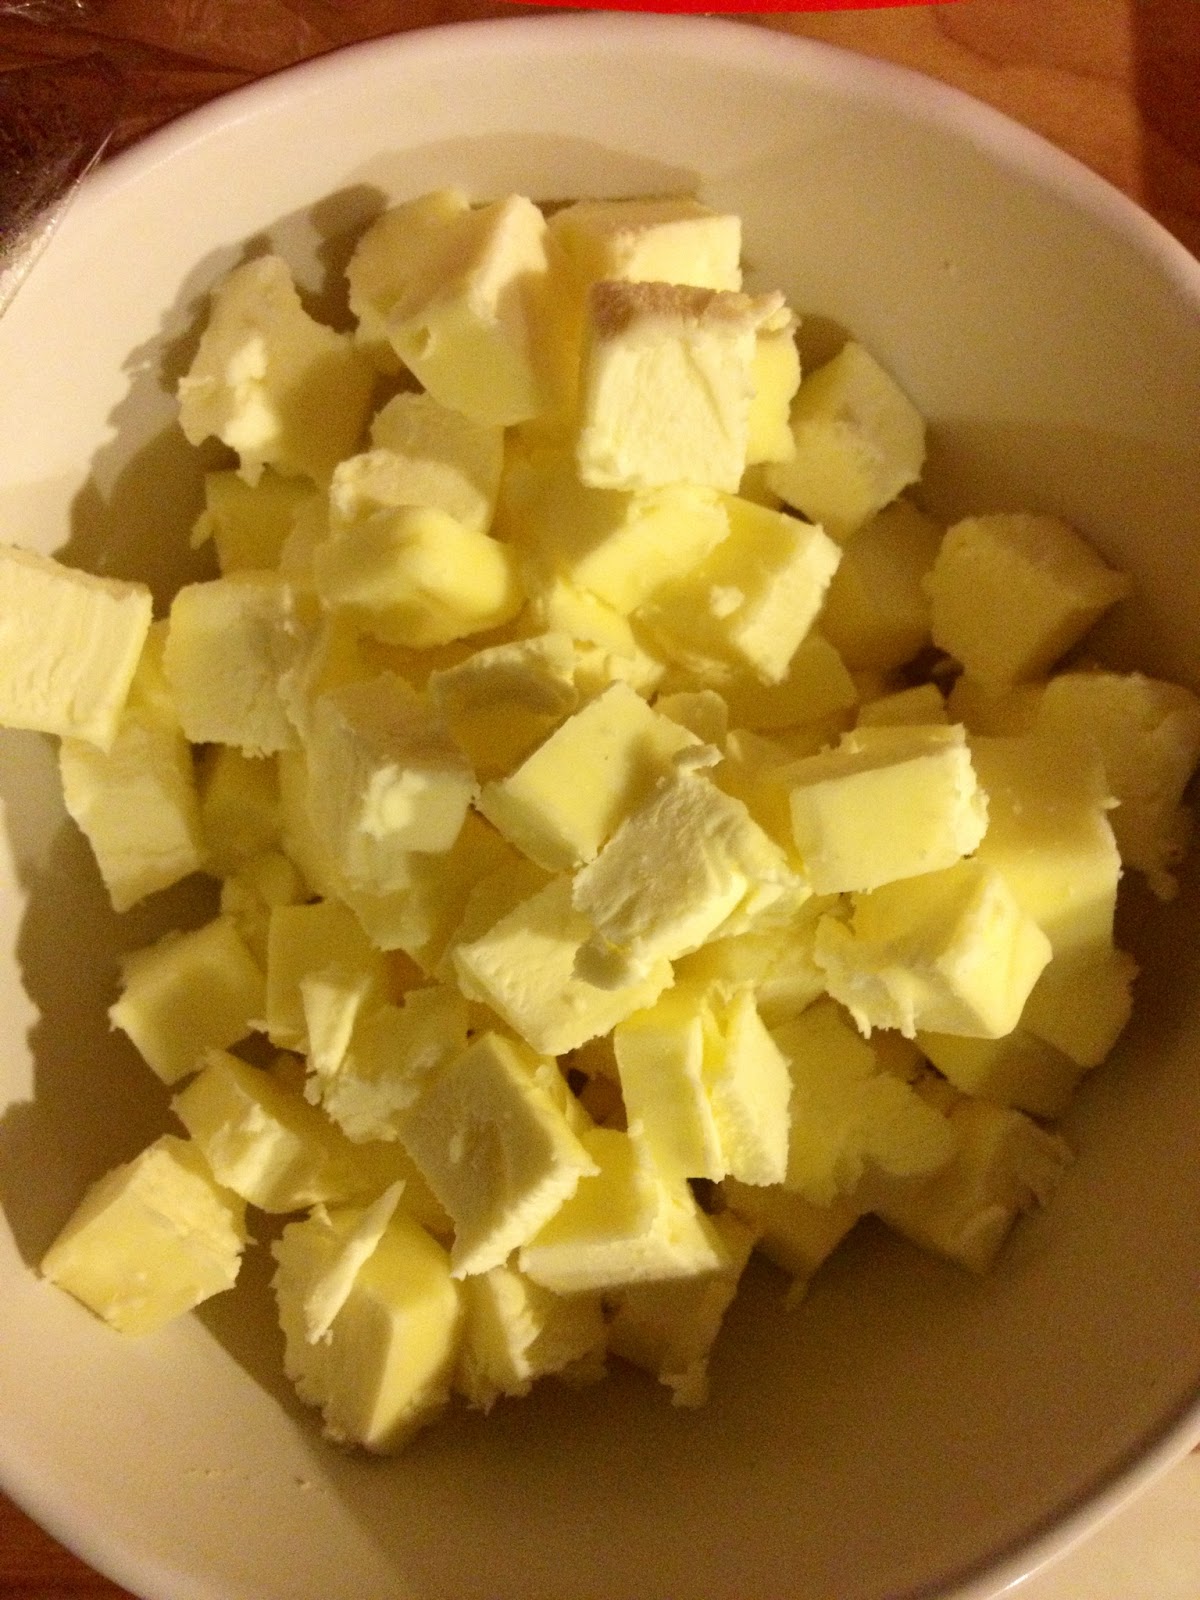
-2 sticks unsalted butter, cut into 1/2 inch cubes and refrigerated for at least 1 hour before kneading dough.
-1 teaspoon of salt (I use Kosher).
-1 teaspoon of granulated sugar (to balance the flavors in the pastry).
-1/4-1/3 cup ice-cold water (to prevent the butter from melting as you knead the dough with your hands).

INSTRUCTIONS FOR KNEADING THE DOUGH:
-In a medium mixing bowl, add the flour, salt and sugar. Use your hands to stir.
-Add the cubes of butter and use a pastry blender to mix the butter into the flour. Continue until the butter is broken down into pea-sized crumbles (as shown in the video).
-Add the ice-cold water a little bit at a time and knead each time you add water.Continue gently kneading with your hands just until the dough comes together.
-Place the dough in a plastic foil, press it down to form a disc around 6 inches in diameter. Refrigerate for at least 2 hours or overnight (I refrigerated mine overnight). I like to use my hands when kneading dough because that is when I add the most special ingredient of them all-love :)! However, if you would rather not touch the dough until you must, you can use a stand mixer fitted with the hook attachment or food processor to mix the dry ingredients with the butter until the butter is broken down into pea-sized clumps. You will, however, have to mold the dough into a ball using your hands.
INGREDIENTS FOR THE FILLING:
-1 1/2 ground beef (I used ground beef chuck: 80% lean, 20% fat).
-2 tablespoons canola oil or any vegetable oil with no smell.
-1 tablespoon curry powder.
-1 medium red onion, diced.
-1 tablespoon ginger/garlic paste (can be found either where they keep whole herbs in the produce section of the grocery store, or the Indian section of the international aisle in the grocery store).
-2 large carrots, washed, peeled and diced.
-2 small russet potatoes, peeled and cubed into 1/4 inch cubes.
-1 whole cube, beef bullion (I used Knorr brand. You can also use Maggi brand. This can be found in the Hispanic section of the international aisle at the grocery store).
-1 teaspoon salt.
-1 tablespoon dry thyme.
-1/4 teaspoon cayenne pepper.
-1 tablespoon finely chopped coriander (cilantro).
-2 tablespoons of all-purpose flour mixed with 1 tablespoon of cold tap water. Use a whisk to remove any lumps).
-For egg wash: 1 whole egg and 2 tablespoons of water, well beaten.
INSTRUCTIONS FOR MAKING THE FILLING:
-In a medium sized pan on medium heat, boil the cubed potatoes in 2 cups of water until slightly tender, but not cooked all the way through. Drain the water and set aside (for about 15 mins).
-In the large saute pan, heat the canola oil over medium heat. Add the curry powder and heat until fragrant (about 15 seconds). Add the red onions and ginger/garlic paste and stir. Saute until the onions are translucent.
-Add the thyme, ground beef, and cayenne pepper, stirring to break up the ground beef, and cook for another 3 minutes.
-Crumble the beef bullion into the pan and stir. Add the salt and stir.
-Add the potatoes and stir. Let it cook for about 5 minutes.
-Add the carrots. Stir.
-Add the cilantro and stir.Bring the mixture to a simmer for about 5 minutes. Add the flour/water mix and stir well.This will act as a binder and will also thicken your filling. Remove filling from heat and spread on a baking sheet. Cover loosely with plastic wrap and chill completely in the refrigerator.


ASSEMBLING THE PIE:
.On a well floured surface, roll out the dough into a circle that is 1/8-inch thick. Use a 5-inch round pastry cutter to stamp out dough circles, if you can find one (I used the lid of a small sauce pan -shown in the pic). Collect the scraps of dough, re-roll, and stamp out more circles until you have 10 circles total.

-Lay each circle out flat on a floured baking sheet and cover the rounds that you are not working on with a clean kitchen cloth, to prevent them from drying up.


***PREHEAT YOUR OVEN TO 350 DEGREES FAHRENHEIT***
-Use the cookie scoop or a tablespoon to place 2 full scoops/tablespoons of cooled filling in the center of each round.


-Brush the edges of the pastry circles with a pastry brush dipped in egg wash.

-Fold one end of the circle over the filling, aligning with the other end of the circle to form a half moon shape.


-Use the tines of a fork to press down gently on the edges where the ends meet to crimp the edges, completely sealing them.

-Brush the top of each pie with the egg wash. Prick the tops of each pie with a fork to help release steam from the pie as it cooks.


-Bake pies in the middle rack of the oven for 25-30 minutes, or until the crust is golden brown and filling is just bubbling through the tops. Remove pies from the oven and let cool for at least 10 minutes before eating

Now your snack and drink is ready. These pies are perfect for cocktail parties, picnics or office pot-lucks. They smell and taste incredible! You can eat them plain, or dip them in some berbeque sauce, sweet and sour sauce or any kind of chutney.The juice goes down smoothly and the pineapple juice balances out the tart flavor of the hibiscus. And no preservatives-something you can feel good about when serving to your family. Enjoy!


I made some Nigerian meat-pies this weekend. This is basically a meat-filled pastry. The pastry is simple and made of all-purpose flour, cold butter, ice-water and some salt. The filling is a savory mix of ground beef, carrots and potatoes, onions, salt and some herbs and spices. The pastry is filled with the cooked ground beef, is sealed and baked The result is a flaky pastry pocket filled with savory goodness that smells incredible! To wash it all down, I made some Zobo. This is simply a drink made from the crimson sepals/calyces of the Hibiscus sabdariffa flower. This is a drink that is popular in West Africa. In fact, Senegal considers a variation of this drink, it's national drink. it is also enjoyed in the Caribbean, Latin America, Asia and Europe. Not only does this drink taste great, it is also good for you. It is rich in anti-oxidants and research has shown that it helps lower high-blood pressure for people with type 2 diabetes. I am sipping on a cold glass of this cranberry-like drink as I type this. Aaah..bliss!! No artificial additives and colors. Just natural goodness!
INGREDIENTS FOR THE "ZOBO" (HIBISCUS JUICE):
-2 cups hibiscus, rinsed and drained. (I bought mine at a Hispanic grocery store . It goes by "Jamaica" or "Flor de Jamaica" there. You can also find it at Caribbean stores, where it goes by "Roselle". You can also find it in the US at Trader Joe's or Whole foods).
-10 cups of water.
-1/4 teaspoon baking soda, NOT baking powder (to help reduce some of the tartness).
-1/2 teaspoon pure vanilla extract.
-1/2 teaspoon orange blossom water (can be found on Amazon.com or at any Indian grocery store).
-1/2 teaspoon ginger paste (can be found in the produce section of the grocery store, by where they have the fresh herbs).
-1 cup of granulated sugar.
-1 cup of 100% pineapple juice (the kind you find in the frozen juice section of the grocery store).
INSTRUCTIONS FOR BREWING THE ZOBO:
-In a large pot on medium heat, bring the water to a boil.
-Add in the rinsed and drained hibiscus, the ginger paste, the baking soda, vanilla extract and orange-blossom water.
-Turn off the heat and cover the pot and let the hibiscus steep in the pot for 1-2 hrs.
-Using a large, fine mesh sifter over a large bowl or pitcher, strain the zobo into the pitcher or large bowl. If any sediments go through the sifter, repeat the process until there are no sediments in the concentrate.
-Add the pineapple juice into the sifted zobo concentrate, stir and refrigerate for at least an hour.
-To serve, add a little bit of water to a glass, and ice cubes if desired, and top the glass off with the zobo concentrate.
**If stored in a covered carafe or gallon, the zobo can keep refrigerated for up to a week.***
SERVING SIZE FOR THE MEAT PIES: Makes 11 medium meat pies.
SPECIAL EQUIPMENT FOR THE MEAT PIES:
-Measuring spoons.
-1 large mixing bowl with lid.
-Cling foil (for wrapping the kneaded dough).
-Large saute pan.
-Medium pan.
-Rolling pin.
-Pastry brush.
-Fork.
-5 inch round dough/cookie cutter (I couldn't find one, so I used the lid of a small pan whose edge was sharp enough to cut through dough.See pic).
-2 baking sheets lined with parchment paper or Silpat (oven and food-safe silicon mat).
-Clean kitchen cloth.
-Pastry blender (for mixing the butter into the flour).
-Shallow rectangular container (to spread your cooked filling and let it cool)
-cling/plastic foil.
INGREDIENTS FOR THE PASTRY/CRUST:
-3 cups flour
-2 sticks unsalted butter, cut into 1/2 inch cubes and refrigerated for at least 1 hour before kneading dough.
-1 teaspoon of salt (I use Kosher).
-1 teaspoon of granulated sugar (to balance the flavors in the pastry).
-1/4-1/3 cup ice-cold water (to prevent the butter from melting as you knead the dough with your hands).
INSTRUCTIONS FOR KNEADING THE DOUGH:
-In a medium mixing bowl, add the flour, salt and sugar. Use your hands to stir.
-Add the cubes of butter and use a pastry blender to mix the butter into the flour. Continue until the butter is broken down into pea-sized crumbles (as shown in the video).
-Add the ice-cold water a little bit at a time and knead each time you add water.Continue gently kneading with your hands just until the dough comes together.
-Place the dough in a plastic foil, press it down to form a disc around 6 inches in diameter. Refrigerate for at least 2 hours or overnight (I refrigerated mine overnight). I like to use my hands when kneading dough because that is when I add the most special ingredient of them all-love :)! However, if you would rather not touch the dough until you must, you can use a stand mixer fitted with the hook attachment or food processor to mix the dry ingredients with the butter until the butter is broken down into pea-sized clumps. You will, however, have to mold the dough into a ball using your hands.
INGREDIENTS FOR THE FILLING:
-1 1/2 ground beef (I used ground beef chuck: 80% lean, 20% fat).
-2 tablespoons canola oil or any vegetable oil with no smell.
-1 tablespoon curry powder.
-1 medium red onion, diced.
-1 tablespoon ginger/garlic paste (can be found either where they keep whole herbs in the produce section of the grocery store, or the Indian section of the international aisle in the grocery store).
-2 large carrots, washed, peeled and diced.
-2 small russet potatoes, peeled and cubed into 1/4 inch cubes.
-1 whole cube, beef bullion (I used Knorr brand. You can also use Maggi brand. This can be found in the Hispanic section of the international aisle at the grocery store).
-1 teaspoon salt.
-1 tablespoon dry thyme.
-1/4 teaspoon cayenne pepper.
-1 tablespoon finely chopped coriander (cilantro).
-2 tablespoons of all-purpose flour mixed with 1 tablespoon of cold tap water. Use a whisk to remove any lumps).
-For egg wash: 1 whole egg and 2 tablespoons of water, well beaten.
INSTRUCTIONS FOR MAKING THE FILLING:
-In a medium sized pan on medium heat, boil the cubed potatoes in 2 cups of water until slightly tender, but not cooked all the way through. Drain the water and set aside (for about 15 mins).
-In the large saute pan, heat the canola oil over medium heat. Add the curry powder and heat until fragrant (about 15 seconds). Add the red onions and ginger/garlic paste and stir. Saute until the onions are translucent.
-Add the thyme, ground beef, and cayenne pepper, stirring to break up the ground beef, and cook for another 3 minutes.
-Crumble the beef bullion into the pan and stir. Add the salt and stir.
-Add the potatoes and stir. Let it cook for about 5 minutes.
-Add the carrots. Stir.
-Add the cilantro and stir.Bring the mixture to a simmer for about 5 minutes. Add the flour/water mix and stir well.This will act as a binder and will also thicken your filling. Remove filling from heat and spread on a baking sheet. Cover loosely with plastic wrap and chill completely in the refrigerator.
ASSEMBLING THE PIE:
.On a well floured surface, roll out the dough into a circle that is 1/8-inch thick. Use a 5-inch round pastry cutter to stamp out dough circles, if you can find one (I used the lid of a small sauce pan -shown in the pic). Collect the scraps of dough, re-roll, and stamp out more circles until you have 10 circles total.
-Lay each circle out flat on a floured baking sheet and cover the rounds that you are not working on with a clean kitchen cloth, to prevent them from drying up.
***PREHEAT YOUR OVEN TO 350 DEGREES FAHRENHEIT***
-Use the cookie scoop or a tablespoon to place 2 full scoops/tablespoons of cooled filling in the center of each round.
-Brush the edges of the pastry circles with a pastry brush dipped in egg wash.
-Fold one end of the circle over the filling, aligning with the other end of the circle to form a half moon shape.
-Use the tines of a fork to press down gently on the edges where the ends meet to crimp the edges, completely sealing them.
-Brush the top of each pie with the egg wash. Prick the tops of each pie with a fork to help release steam from the pie as it cooks.
-Bake pies in the middle rack of the oven for 25-30 minutes, or until the crust is golden brown and filling is just bubbling through the tops. Remove pies from the oven and let cool for at least 10 minutes before eating
Now your snack and drink is ready. These pies are perfect for cocktail parties, picnics or office pot-lucks. They smell and taste incredible! You can eat them plain, or dip them in some berbeque sauce, sweet and sour sauce or any kind of chutney.The juice goes down smoothly and the pineapple juice balances out the tart flavor of the hibiscus. And no preservatives-something you can feel good about when serving to your family. Enjoy!
My kids love these. It is one of their favourite snacks.
ReplyDeleteHey there Khourt! Thanks for checking out my post :). These pies are very kid-friendly as they're easy to hold and also taste great! Your kids have great taste :)
DeleteI haven't tried this but am sure its tasty.
ReplyDelete@Kuteesa Violet
ReplyDeleteHi Violet. Thanks for stopping by! These are very tasty! Hope you get to give them a try :)